
Practical editing · Phone & desktop
Inside a Selyna Music-Video Edit
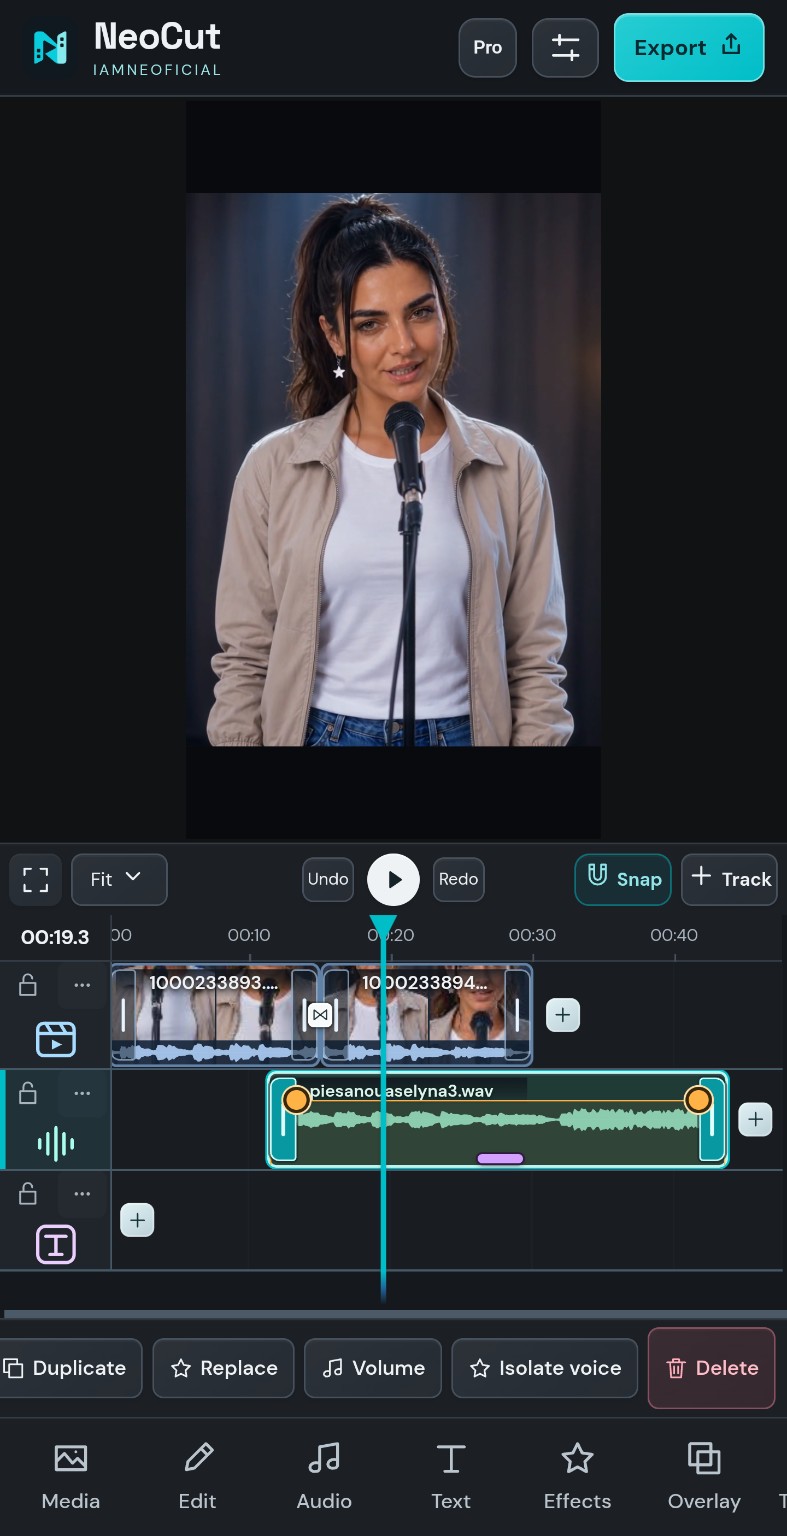
A look at a real project in progress: Selyna’s performance footage and a separate music track, arranged in NeoCut on a phone. This is the starting edit, before a finished video has been approved.
Open NeoCut and follow along ↗From the working project
Picture and music on separate rows
The capture shows two consecutive video clips on the video row and a separate WAV soundtrack beneath them. Their waveforms make the audio visible while the playhead marks the current position.
The Text row is still empty at this stage. Keeping the soundtrack separate leaves room to work on picture cuts without having to cut the song at every change of shot.
Project capture supplied by the creator, September 2026. It shows an earlier interface during editing, not a finished export or the latest button layout.
What this edit already demonstrates
- A sequence of shots: the two video clips share one row and play one after the other.
- A separate music bed: the WAV file has its own start, end and volume control.
- A mobile workspace: the preview sits above the timeline, with clip commands within reach below it.
This capture does not establish final synchronisation, sound quality or export performance. Those need checking by playing and exporting the actual project.
The next editing pass
- Match picture to the music.Play each shot against the song. Zoom into the timeline for alignment and trim unwanted starts or endings. Use the source audio as a reference if it helps, then mute it when the separate soundtrack should take over.
- Check every cut.Listen and watch across the join between clips. Add a transition only when it supports that moment; a clean cut may fit the music better.
- Add titles after the timing settles.Put the artist name and song title on the Text row. Check readability on a phone and keep each title on screen long enough to read.
- Review, save and export.Listen from start to finish, check any blank gaps, save the project with its media and review a short export before rendering the whole piece.
Follow the music guide and text guide to try the same building blocks with your own footage.
Keep the session editable
A project backup keeps clips and titles available for the next revision. In NeoCut, use Project settings → Save project + media and keep the downloaded file somewhere safe. The account restores Pro access; it does not upload or sync the project's media.
Basic assembly, volume and 720p export are available in Free. Pro adds the wider creative library, advanced audio tools and higher export resolutions on supported devices. See Free and Pro for the current options.